
My first 3D printer: Anycubic Vyper
3D printing is no longer a technology reserved only for companies, research institutions, or ambitious hobbyists. The first comparatively affordable desktop 3D printers came onto the market in the late 2000s. One of the best-known early examples was the MakerBot CupCake CNC from 2009. At the time, it cost around 750 US dollars and was still supplied as a kit (Wired).
A lot has changed since then. The machines are now not only cheaper, but above all faster, more reliable, and much easier to use. The most common devices are so-called FDM printers. FDM stands for Fused Deposition Modeling, commonly referred to in German as Schmelzschichtung. In this process, a plastic filament is heated and built up layer by layer through a nozzle to create a three-dimensional object (Stratasys).
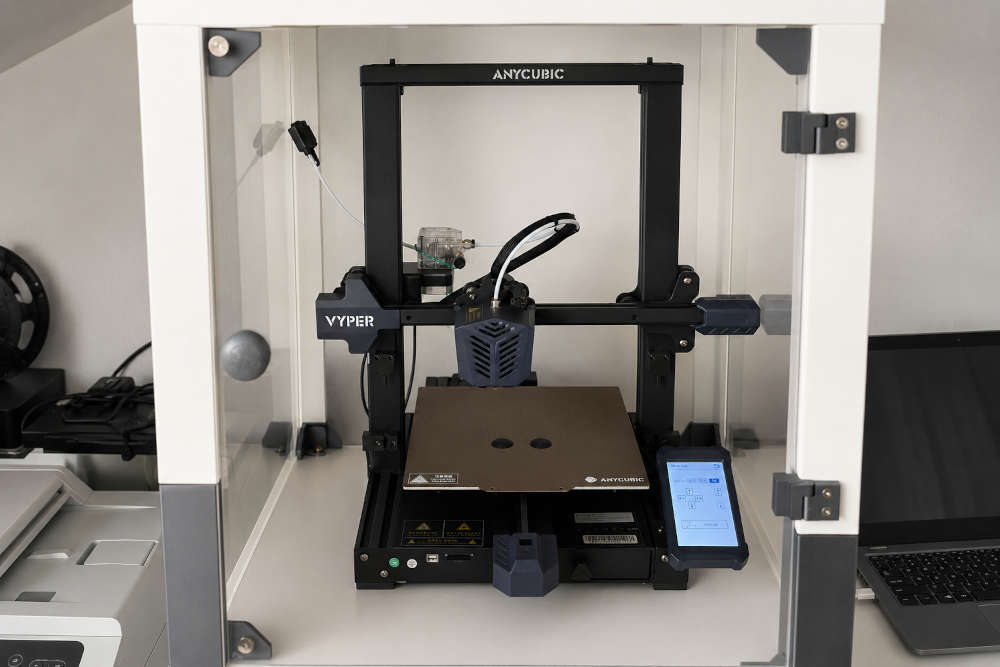
I bought my first 3D printer in 2021 for around 350 euros: the Anycubic Vyper. The model was introduced in June 2021 and initially had a regular price of 359 US dollars (Anycubic). Since then, 3D printers have advanced significantly, particularly in terms of printing speed. For the Vyper, around 80 mm/s was recommended as a normal printing speed. A widely used printer today, such as the Bambu Lab A1, typically operates at around 200 to 300 mm/s in its standard profiles and can reach significantly higher speeds under suitable conditions. In one test, for example, the A1 needed just over 19 minutes for a 3DBenchy, a commonly used test model (Tom’s Hardware). A smaller model that takes my Vyper around an hour can therefore, depending on its geometry, material, and quality settings, be finished on a modern printer in roughly 15 to 30 minutes. I still have my Vyper, however, because I only print very irregularly. Sometimes it runs for several days in a row, while at other times it is not switched on for weeks or even months. It becomes interesting to me whenever a problem suddenly arises for which there is no suitable solution available to buy.
What I use my 3D printer for
Of course, you can simply download ready-made models from the internet and print them. Platforms such as Thingiverse offer a huge selection of figures, mounts, spare parts, toys, and all kinds of more or less useful things. That is fun, but it was never the real appeal of 3D printing for me. It becomes interesting when I can solve a problem myself. A part is missing, something does not fit properly, or there is simply no suitable product for a very specific purpose. In that case, I can design the required component myself and hold it in my hands just a few hours later.
For example, I have already created a sound deflector for the television, an aerobridge for my bicycle, as well as various parts for our campervan, including screw covers and battery terminal covers.
For me, it is precisely these small parts that demonstrate the real value of a 3D printer. They are often highly specific and would either not be commercially available at all or would only be obtainable with a disproportionate amount of effort.
In the future, my own models will be collected under Activities. There, they can be viewed and also downloaded for personal use.
But how do you actually get from an idea to a finished plastic part?
Step 1: The 3D model
Every print starts with a digital three-dimensional model.
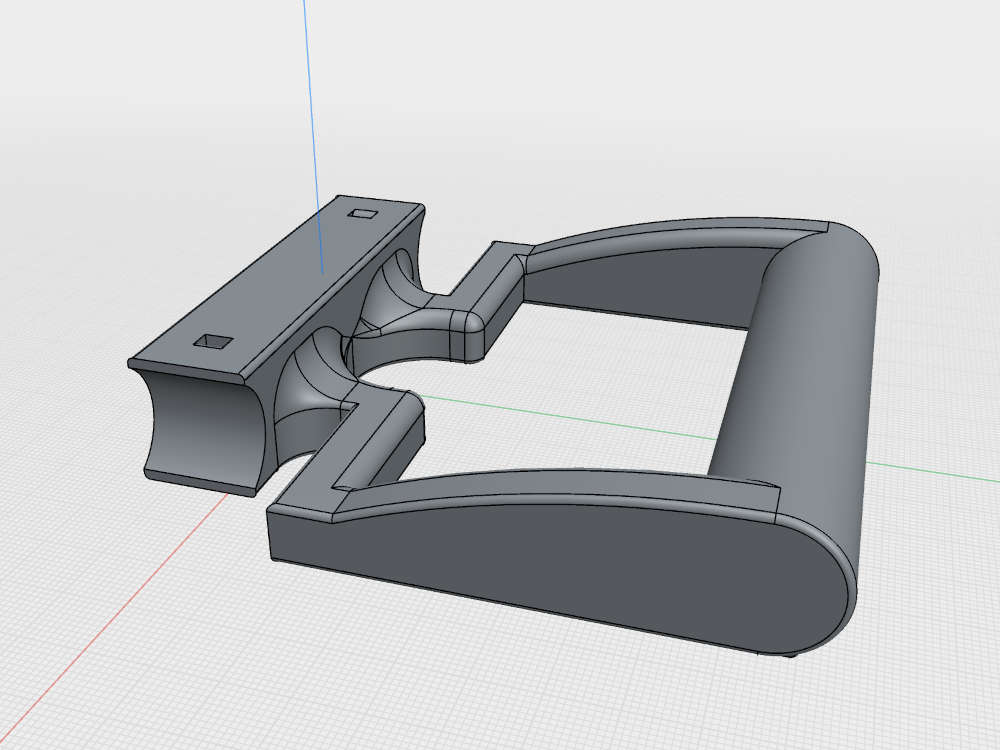
You can either create one yourself or download an existing model. For my own designs, I use Shapr3D. The software is surprisingly intuitive for beginners. There is a limited free Basic version with restricted export options, as well as a paid Pro version that can be tested free of charge for 14 days (Shapr3D).
The basic workflow is relatively simple: you first draw, for example, a rectangle or a circle with exact dimensions and then pull this two-dimensional shape into the third dimension. This creates a solid body. You can then cut out holes, round off edges, or add additional bodies.
After a short learning period, surprisingly complex parts can already be designed this way. There are also numerous explanatory videos and tutorials available for Shapr3D.
If you do not want to spend money on CAD software, there are also free alternatives, such as FreeCAD. And if you do not want to design anything yourself at all, you can find a large number of ready-made models on Thingiverse and similar platforms that can be used directly for 3D printing.
Step 2: The right filament
Once you have a model, you still need the material it will be made from.
A classic FDM 3D printer such as my Anycubic Vyper uses plastic in the form of so-called filament. Put simply, this is a long plastic strand wound onto a spool. In many 3D printers for home use, this filament has a diameter of 1.75 millimeters.
There are many different plastics, each with different properties. I most commonly use PLA and PETG.
PLA (polylactide) is particularly easy to print. It warps very little as it cools and produces clean print results. This makes it very suitable for beginners as well as for models and components that are not exposed to high mechanical or thermal loads. PLA is also usually made from renewable raw materials. The starting materials are plant-based sugars or starches, for example from corn, sugar cane, or sugar beets, which are first fermented into lactic acid and then further processed into plastic. PLA is therefore considered a bio-based plastic. Although it is in principle biodegradable or compostable, this mainly applies under the high temperatures and controlled conditions of industrial composting facilities. In a home compost or in the natural environment, by contrast, it degrades only very slowly.
PETG (polyethylene terephthalate glycol) is tougher and more temperature-resistant and is therefore often better suited for functional components. However, during printing it has a somewhat greater tendency to form small plastic threads between individual areas, known as stringing. Overhangs are also often more difficult to print cleanly with PETG (Prusa). PETG is a modified form of PET, which is also used, for example, in beverage bottles. Unlike PLA, PETG is usually made from fossil raw materials and is not biodegradable or compostable. It can in principle be recycled, although PETG print waste cannot be disposed of through conventional PET recycling streams everywhere.
Which material makes sense therefore depends on what the component will later need to withstand. A decorative object in the living room has different requirements from a mount on a bicycle or a component in a campervan.
Step 3: Turning the model into printer movements
A 3D printer cannot initially do anything with the actual 3D model. Instead, it needs to know where the print head should move, how fast it should travel, how much plastic needs to come out of the nozzle, and when the next layer should begin.
This translation is handled by so-called slicer software. I use UltiMaker Cura, a free and open-source program.
The term slicer comes from the English word slice. The software divides the three-dimensional model into many thin horizontal layers. From these layers, it then calculates the movements the printer has to perform. The result is usually a so-called G-code file.
Numerous parameters can be adjusted: layer height, printing speed, temperature, wall thickness, or how much of the inside of a component should be filled.
After all, a 3D-printed part does not have to be made entirely of solid plastic. Often, the outer wall consists of several solid layers, while the inside is filled only with a lattice-like structure known as infill. This saves material, weight, and printing time.
Step 4: Onto the printer
Once the model has been sliced, the generated file has to be transferred to the printer. With my Anycubic Vyper, for example, this is done using a memory card. Newer printers can often also receive files directly via Wi-Fi.
The desired filament is then loaded and the print is started.
Inside the print head is a heated nozzle. Depending on the plastic being used, the filament is typically heated there to temperatures of around 200 to 250 degrees Celsius. This makes it soft enough to be pushed through the small opening in the nozzle.
The nozzle deposits a thin line of plastic onto the print bed. Once the first layer is complete, the print head or the print bed moves a tiny distance in height. The next layer is then printed on top. And then the next one, and so on.
In this way, the finished three-dimensional component slowly emerges from hundreds or thousands of thin plastic layers. This also explains why even relatively small parts can take several hours. The printer really does build the object up layer by layer.
The problem with overhangs
At the same time, this method leads to one of the most important limitations of FDM 3D printing: the printer cannot simply print into thin air.
Each new plastic layer normally needs at least some material underneath it to rest on.
A vertical wall is therefore no problem. Sloped surfaces also work well up to a certain point. However, if a surface extends outward too steeply or part of the model begins completely in mid-air, the next plastic layer lacks the necessary support underneath.
As a rough guideline, many FDM printers can still print overhangs of around 45 to 60 degrees without additional support. How well this works, however, depends heavily on the printer, the material, the cooling, and the settings (Prusa).
For more difficult overhangs, the slicer can automatically generate so-called support structures. This creates a kind of temporary plastic scaffold underneath the actual component. After printing, it is removed again.
When designing my own parts, I therefore try to consider how the component will later be positioned on the print bed while I am still modeling it. Sometimes it is enough to print a model the other way around or slightly change a shape in order to avoid large amounts of support material.
This is where you quickly realize that good 3D design is not only about making a component look right on the computer. When designing it, you should already take into account how it will actually be manufactured later.



Leave a comment